Process of a roof replacement
What is the process of a roof replacement?
Step 1: Initial Consultation and Roof Assessment
The roofing replacement process begins with an initial consultation with a professional roofing contractor. During this phase, the contractor will:
- Inspect Your Current Roof: The contractor will assess the condition of your existing roof, looking for signs of wear and tear, leaks, or structural damage. They’ll also check the roof's age and any potential issues that could affect the replacement process.
- Discuss Your Needs and Preferences: You’ll have the opportunity to discuss your roofing needs, budget, and material preferences. The contractor may recommend specific materials based on your home’s architectural style, climate, and budget.
- Provide a Detailed Estimate: After the assessment, the contractor will provide a detailed estimate outlining the costs for materials, labor, and any additional services such as debris removal or repairs to the underlying structure.
Step 2: Choosing the Right Roofing Materials
Selecting the right roofing materials is a crucial part of the process. Your choice will impact the roof’s durability, appearance, and cost. Common roofing materials include:
- Asphalt Shingles: Affordable and widely used, asphalt shingles are available in various colors and styles.
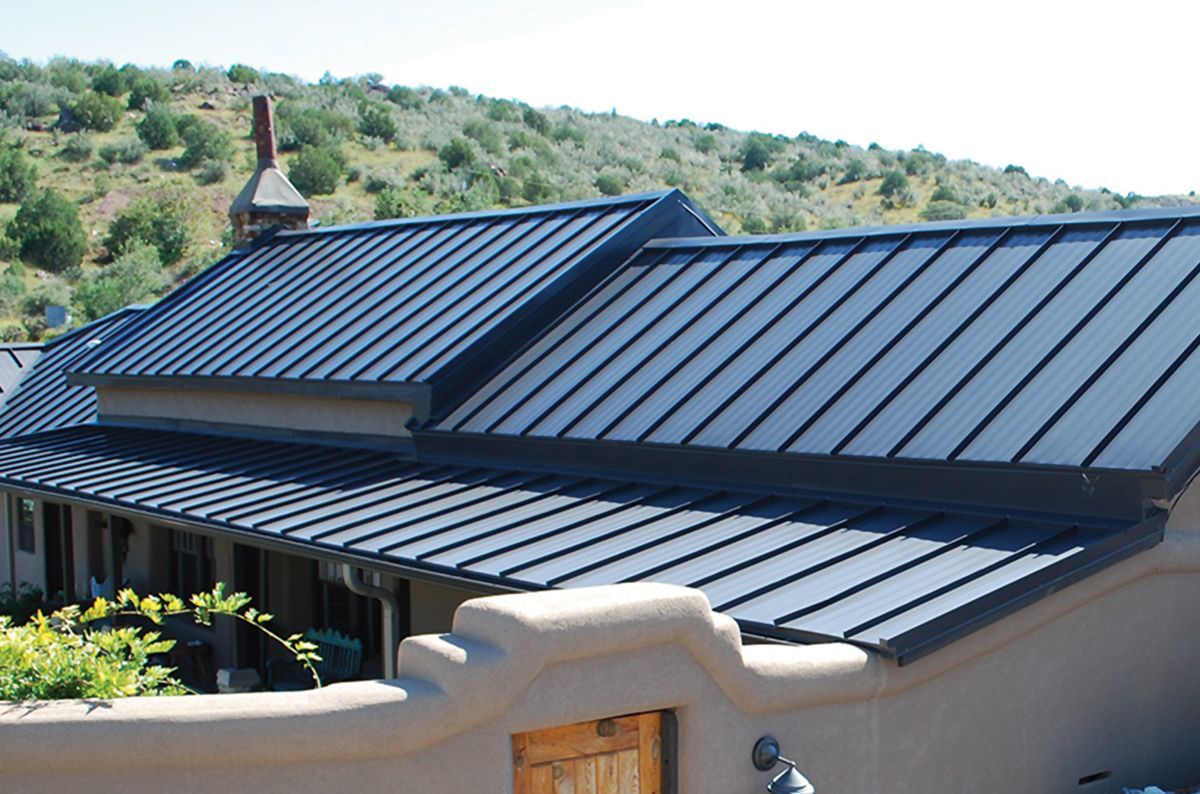
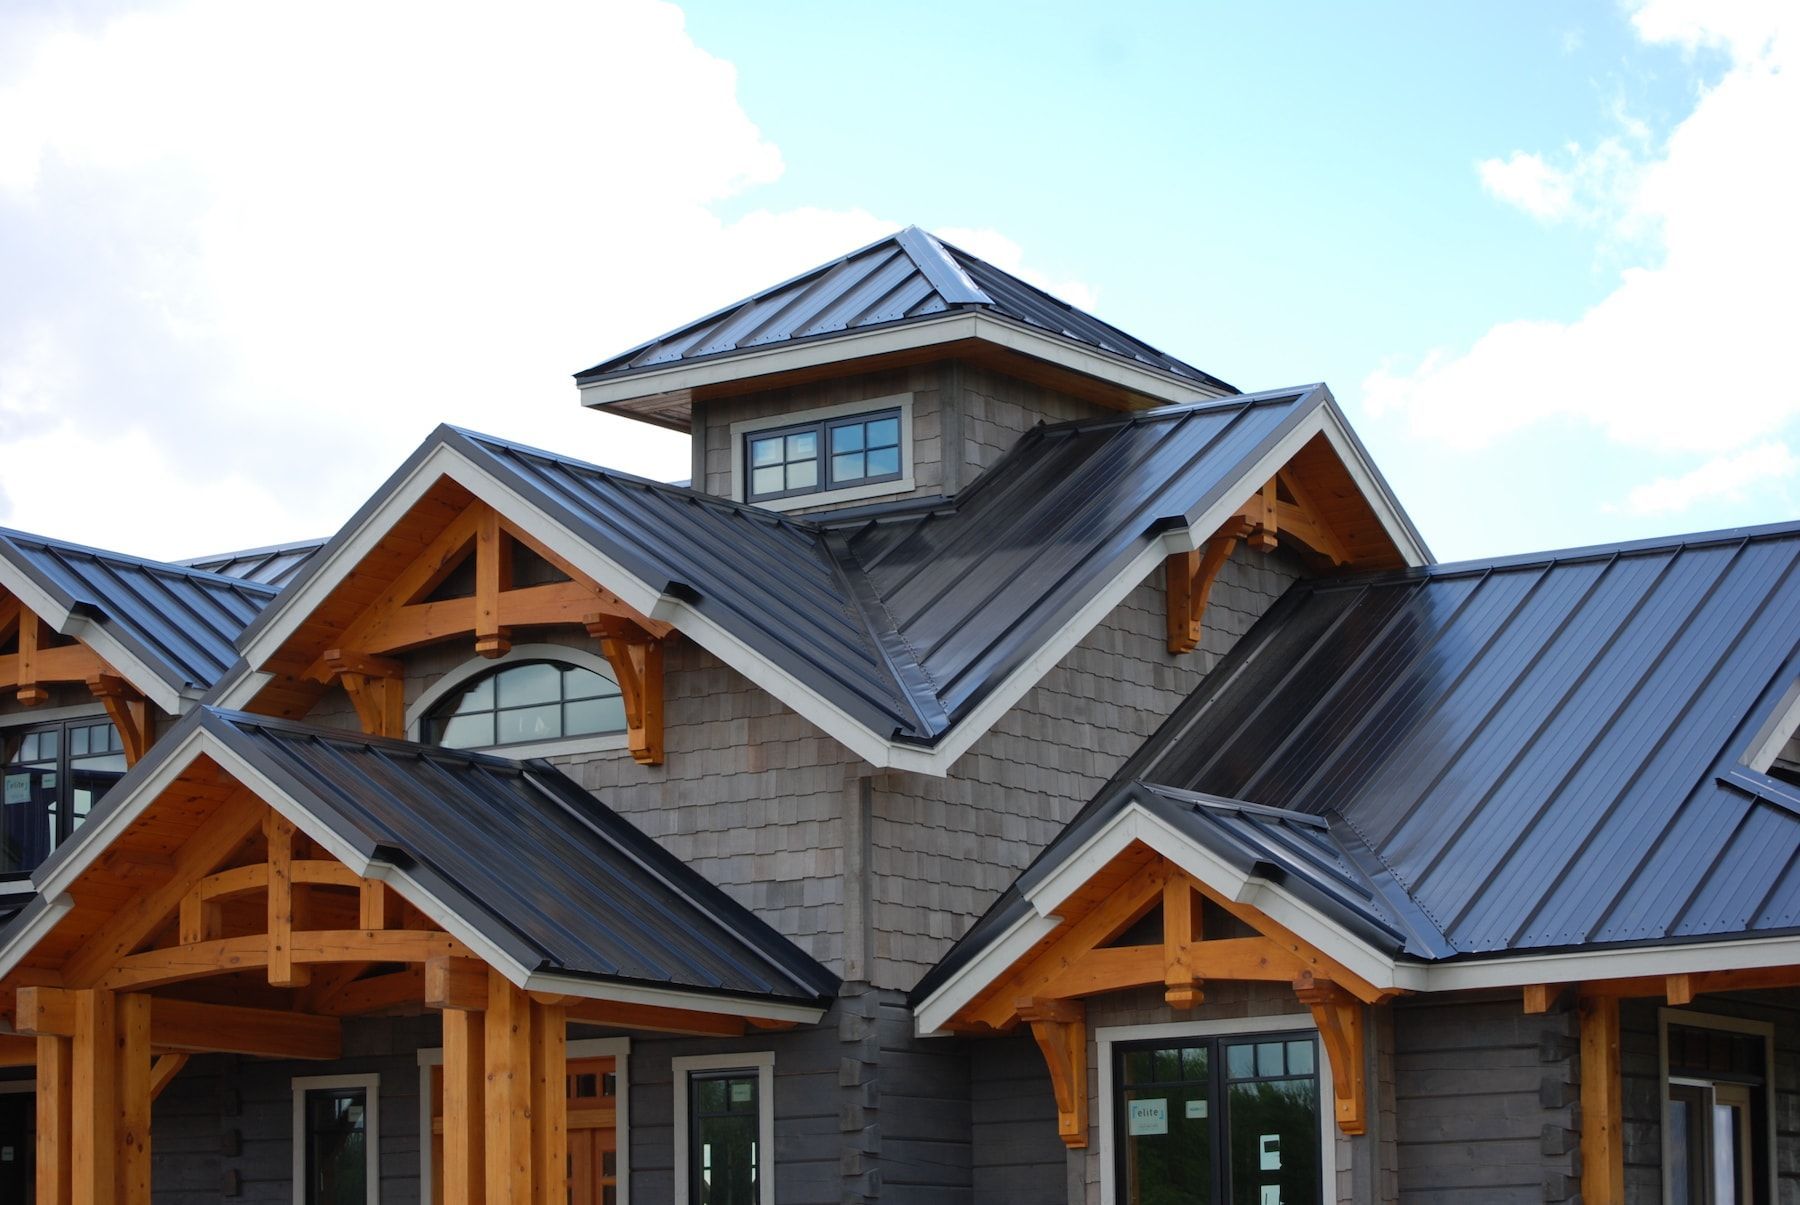
- Metal Roofing: Known for its durability and energy efficiency, metal roofing is an excellent option for many homes.
- Wood Shakes: These offer a natural, rustic appearance and are made from cedar, redwood, or pine.
- Clay or Concrete Tiles: These are durable and provide a distinctive, elegant look, especially for Mediterranean-style homes.
- Slate Roofing: A premium option, slate roofing is long-lasting and offers a high-end, classic appearance.
Your contractor can help you weigh the pros and cons of each material and select the one that best suits your needs.
Step 3: Preparing for Roof Replacement
Once you’ve chosen the materials and agreed on the estimate, the next step is to prepare your home for the roof replacement. Here’s what to expect:
- Scheduling the Project: Your contractor will work with you to schedule a convenient time for the roof replacement. They’ll also discuss the project timeline and any potential weather-related delays.
- Protecting Your Property: The contractor will take steps to protect your property, such as covering landscaping, setting up tarps, and moving outdoor furniture or items away from the work area.
- Obtaining Permits: Depending on local regulations, the contractor may need to obtain permits before starting the work. This ensures that the project complies with building codes and safety standards.
Step 4: Removing the Old Roof
On the day of the replacement, the first major task is removing the old roof. This involves:
- Tearing Off the Old Roofing Materials: The crew will carefully remove the existing shingles, tiles, or other materials. This process can be noisy and messy, but it’s essential to start with a clean slate.
- Inspecting the Roof Deck: After the old materials are removed, the contractor will inspect the roof deck for any damage, rot, or weak spots. If any issues are found, they’ll need to be repaired before the new roof is installed.
- Cleaning Up: The old materials will be collected and disposed of properly, leaving the work area clean and ready for the next phase.
Step 5: Installing the New Roof
With the old roof removed and the deck inspected, the installation of the new roof begins:
- Installing Underlayment: A protective underlayment is applied to the roof deck to create a moisture barrier. This layer is crucial for preventing leaks and extending the life of your roof.
- Adding Flashing and Ventilation: Flashing is installed around chimneys, skylights, and other roof penetrations to prevent water from seeping in. Proper ventilation systems are also added to ensure that your roof breathes and regulates temperature effectively.
- Laying the New Roofing Materials: The new roofing materials—whether shingles, tiles, or metal panels—are carefully installed according to manufacturer guidelines and industry best practices. This step requires precision to ensure a secure, weather-tight roof.
Step 6: Final Inspection and Clean-Up
Once the new roof is in place, the contractor will conduct a final inspection to ensure everything is installed correctly:
- Checking for Quality: The contractor will examine the roof to ensure that all materials are properly aligned, the flashing is secure, and there are no gaps or loose areas.
- Cleaning Up the Job Site: The crew will remove any debris, nails, and excess materials from your property. They’ll also use magnets or other tools to pick up any stray nails or metal pieces that might be left behind.
- Final Walkthrough: Before leaving, the contractor will do a final walkthrough with you to explain the work that was done, answer any questions, and provide information on warranties and maintenance.
Step 7: Enjoying Your New Roof
With the replacement complete, you can enjoy the benefits of your new roof:
- Improved Curb Appeal: A new roof can dramatically enhance the appearance of your home, giving it a fresh, updated look.
- Increased Energy Efficiency: Modern roofing materials often come with energy-efficient features that can help lower your heating and cooling costs.
- Long-Term Protection: A well-installed roof offers peace of mind, knowing that your home is protected from the elements for many years to come.
CONTACT A CONTRACTOR
You might also like